3D Virtual Product Photography
The Process
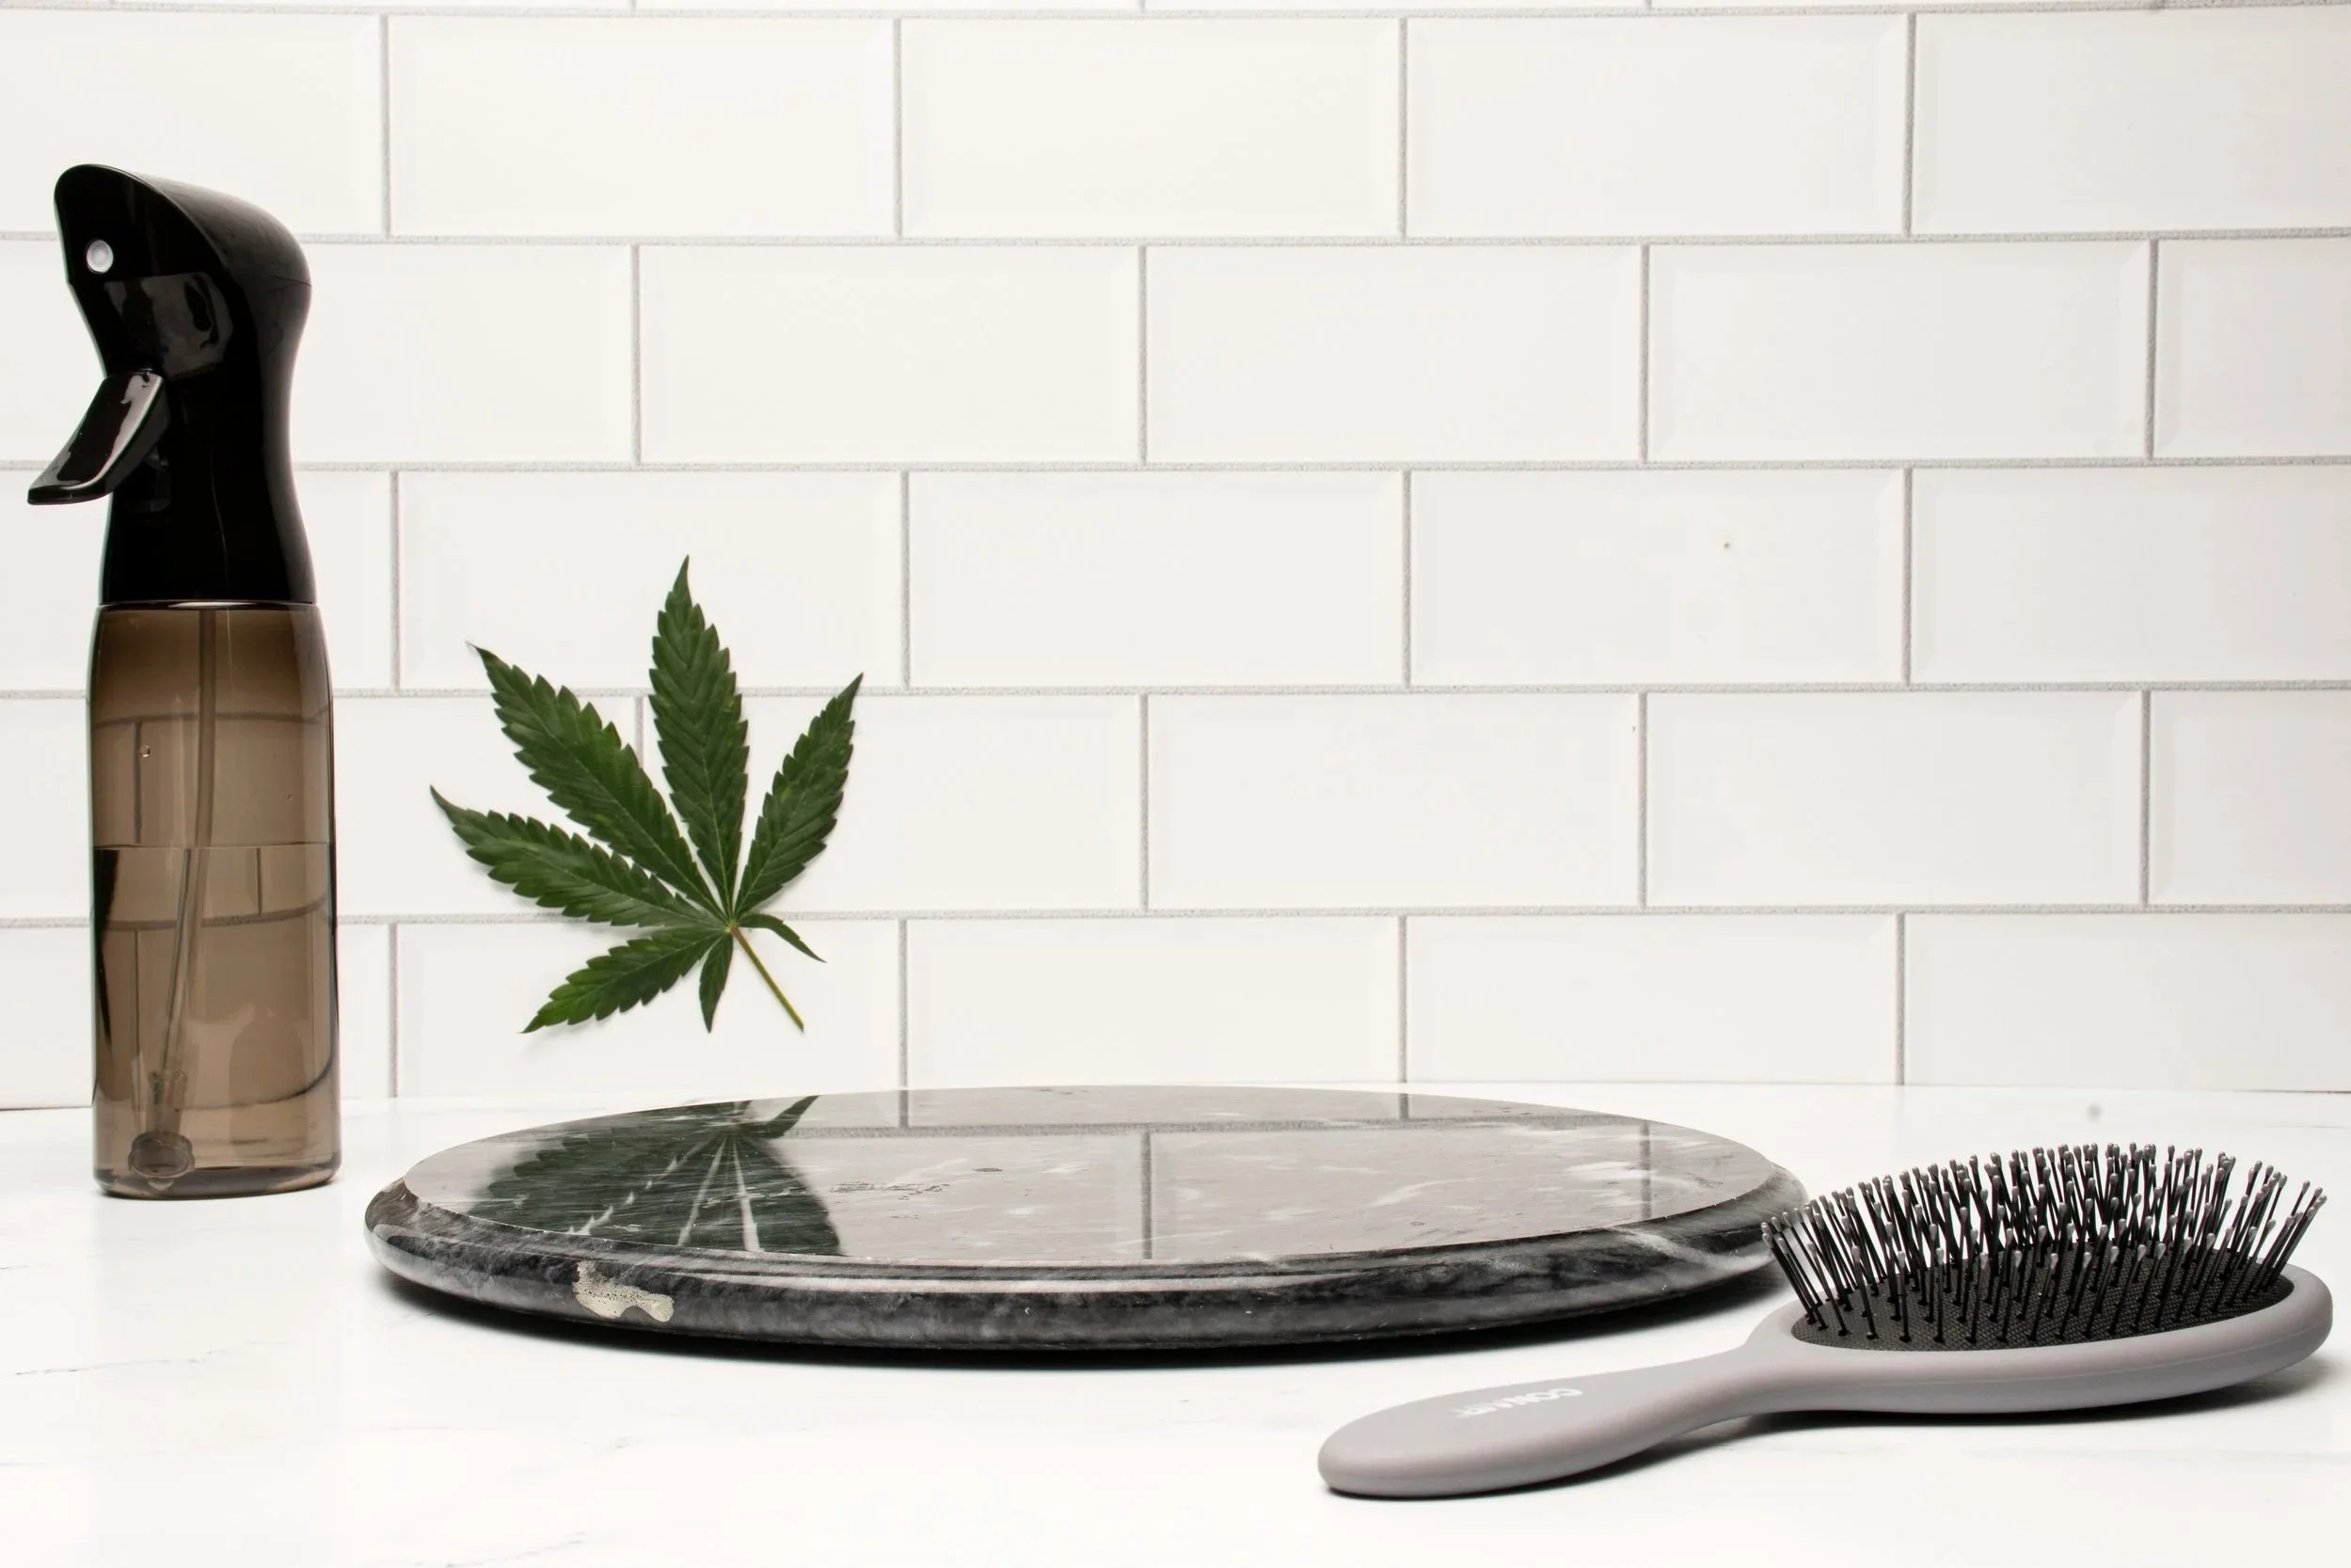
The first step was to produce an image in which I could place the 3D-rendered assets of Hempz lotion product(s). During the brainstorming stage, I figured the most appropriate atmosphere lotion is in the bathroom. I then planned to produce a bathroom setup in the photo studio with a piece of white tile for the backdrop and a piece of white faux marble. Props included a hairbrush, spray bottle, marble lazy susan surface, and a pot leaf (since the product is made with Hemp). The only props purchased were the spray bottle and hairbrush. The dark marble lazy susan was in the stored studio props, and the pot leaf was acquired through a grower I know who has recently trimmed their marijuana plants.
As for lighting, I wanted to create as even and realistic lighting as possible to help when I place the 3D-rendered products on the lazy susan. I went with overhead lighting with a medium-large softbox to create a soft, even tone across the set up.
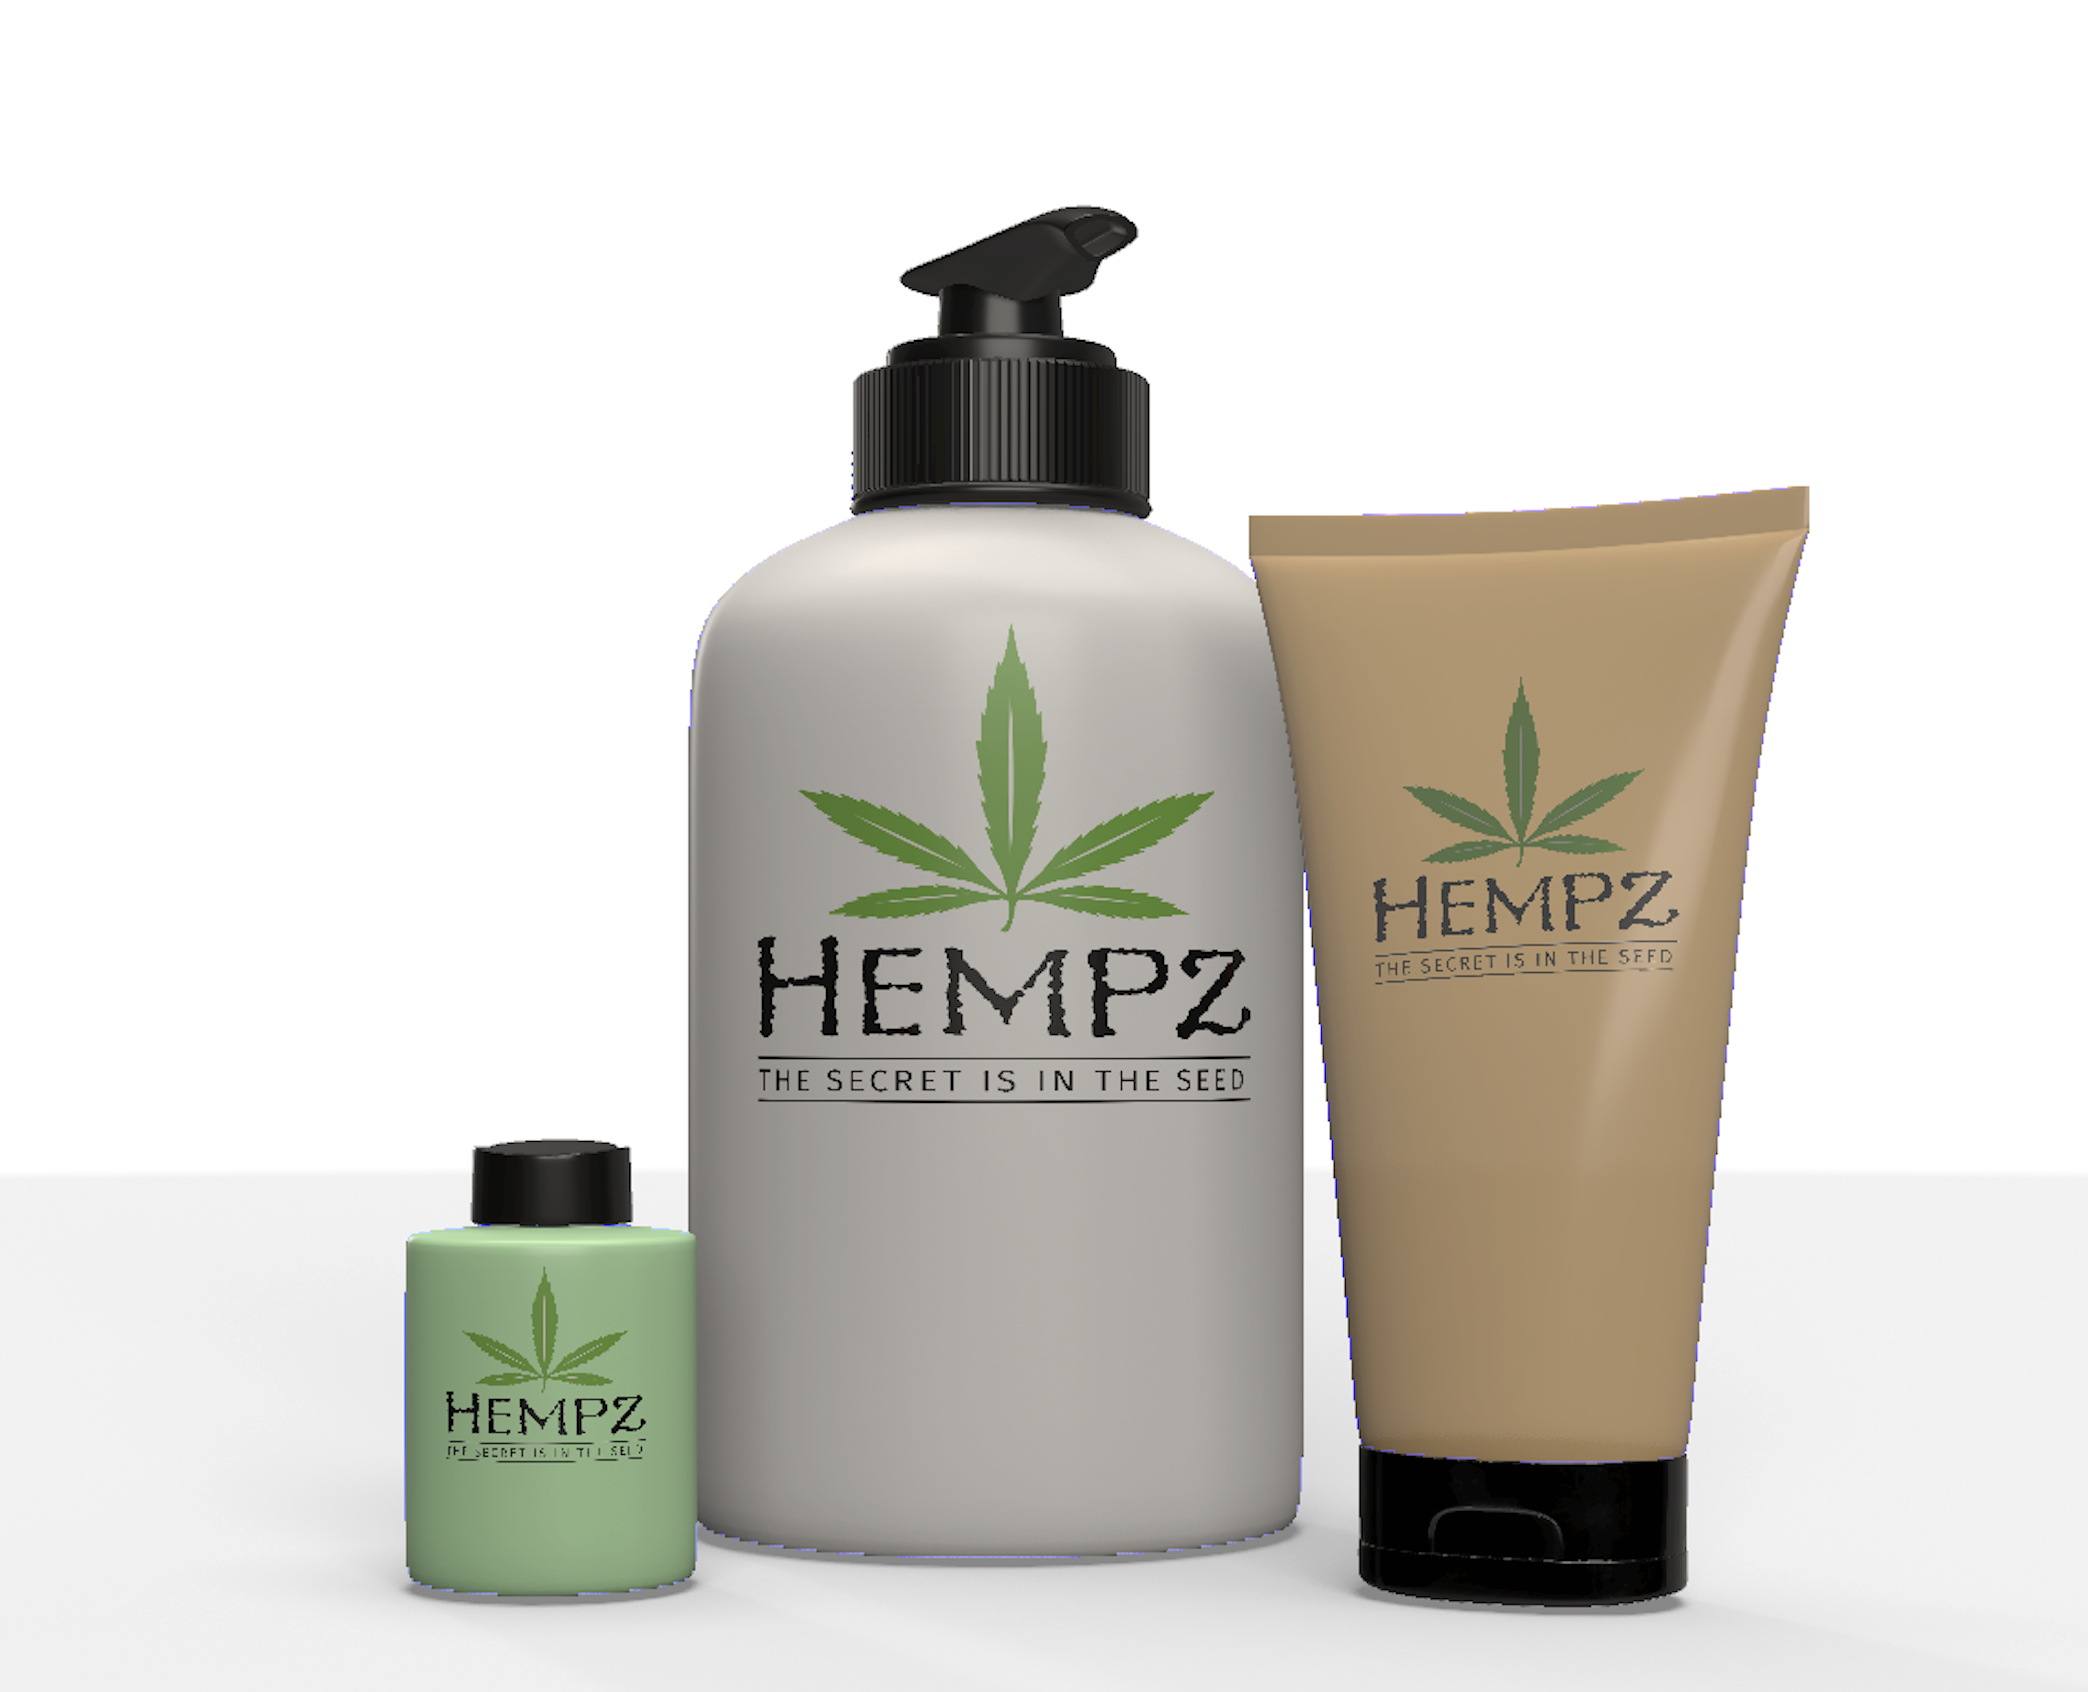
The following image is a screenshot of the 3D-rendered product assets. These assets were created in Adobe Dimensions, and the logo was imported into the program to be placed on the various lotion packages. The lighting is relatively set in the program to match the overhead lighting of the background image I captured in the studio.
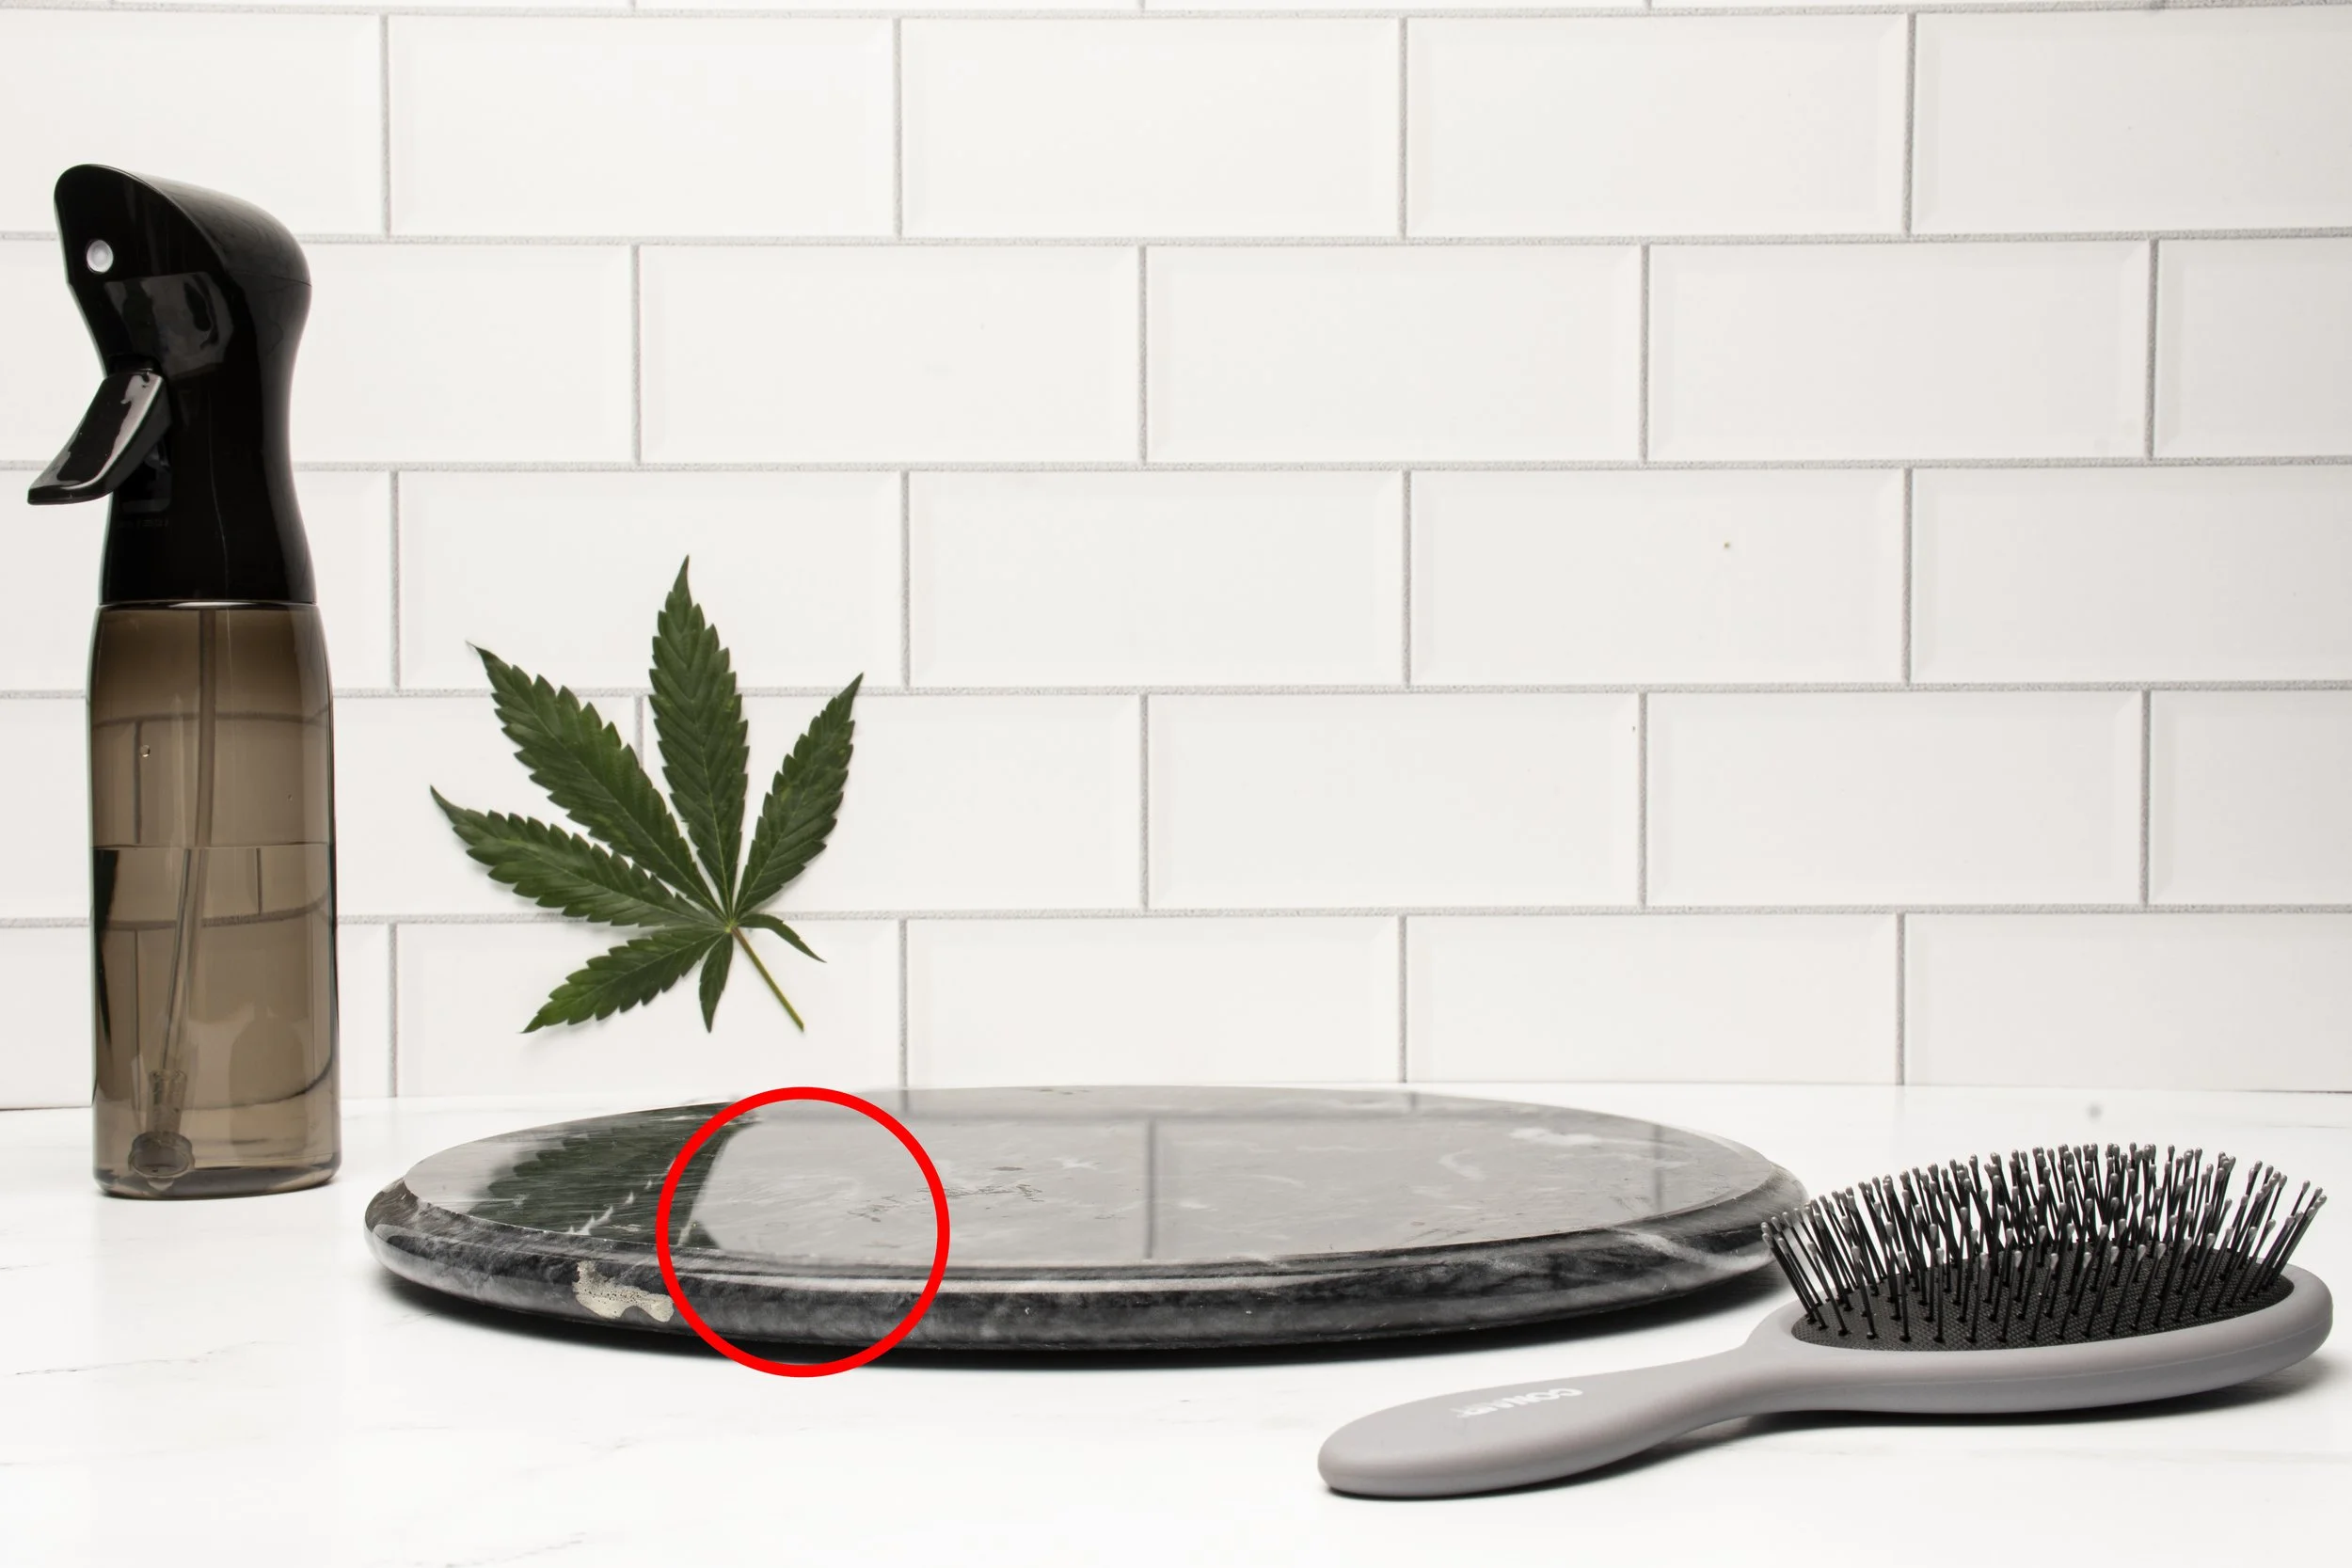
Using the image I had taken as a reference, I placed the 3D lotion products on the dark marble surface. I realized I need to make further Photoshop adjustments on the background image to make room for overlaying the 3D products and their reflections. This image shows the adjustments made to the reflection of the original image. After this adjustment, I took the 3D Dimensions assets (as Photoshop files) and an image and created the reflections of the products on the dark marble surface in Photoshop to add realism. That is how I created the final image referenced below.
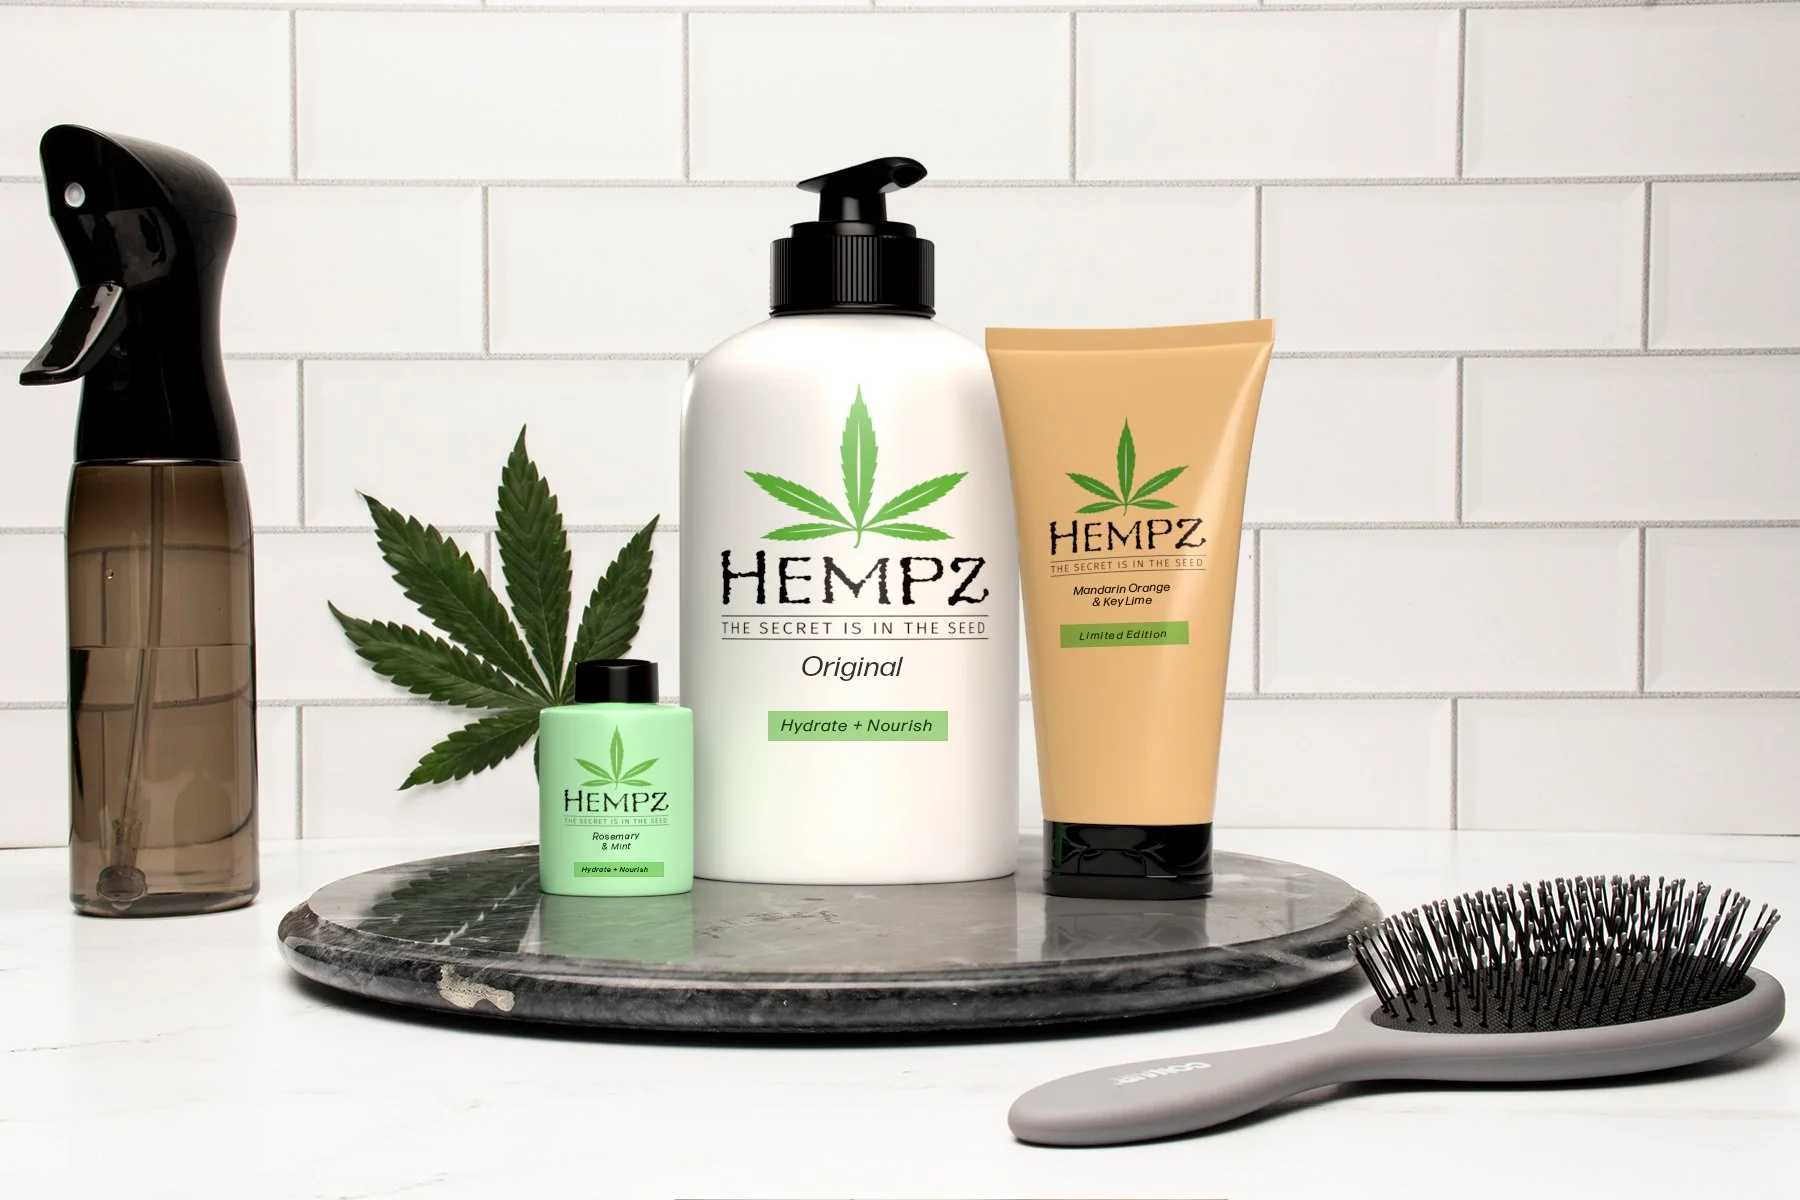
Final Results